TABLE OF CONTENTS
- Configuring Salesforce
- Creating a New Connected App (Settings Required)
- Manage Connected App
- Configuring the Salesforce Connection

To add a Salesforce Connection, go to the Connections page which is accessed via Menu -> Connected Data -> Connections.
NOTE: Salesforce connections are only available on Premium accounts.

You must be an Administrator-level user to see this option.
- Click the ADD CONNECTION button on the top-right of the page to add a new connection. This will bring up a list of connections from which you can choose.

Configuring Salesforce
Log into your Salesforce account and navigate to Setup>Setup for current app (cog icon top right).

Next:
- On the left-hand menu, click on User Interface>Apps>App Manager
- Click on New Connected App on the top right-hand corner

Creating a New Connected App (Settings Required)
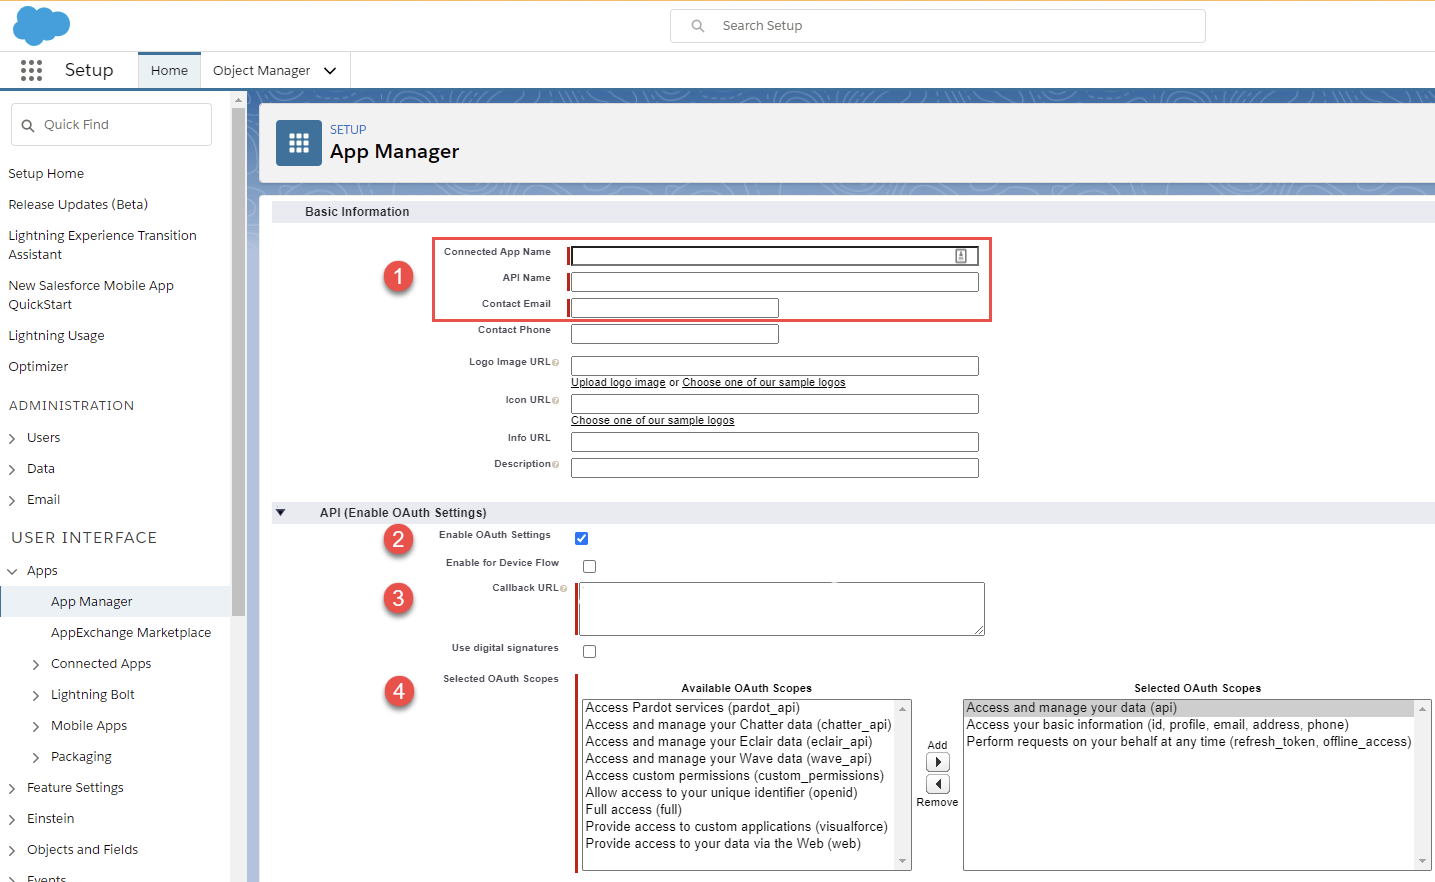
1) Basic Information
- Connected App Name
- API Name
- Contact Email
2) API (Enable OAuth Settings)
- Check the Enable OAuth Settings option
3) The Callback URL can be found on Forms On Fire Web portal after adding a SalesForce Connection

4) Selected OAuth Scopes - The following scopes need to be selected:
- Access and manage your data (api)
- Access your basic information (id, profile, email, address, phone)
- Perform requests on your behalf at any time (refresh_token, offline_access)
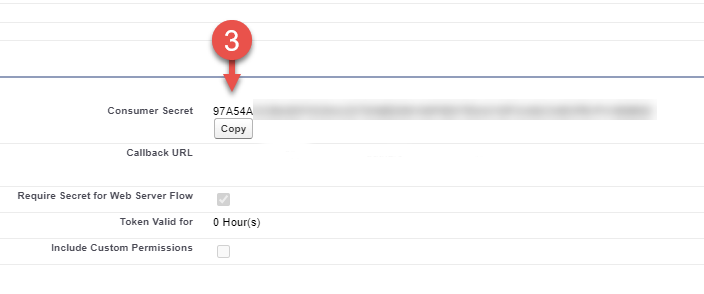
Manage Connected App
After the app is created, the following details are required for configuring your Salesforce Connection:
1) Company Domain

2) Consumer Key

3) Consumer Secret
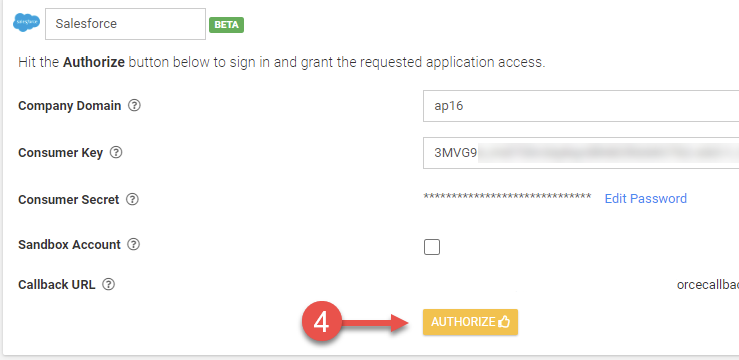
Configuring the Salesforce Connection
Add your Company Domain, Consumer Key and Consumer secret to your Salesforce Connection.
In addition, if your account is a Sandbox Account, check the Sandbox Account option.
On the top-right of the page, hit the “Save”button.

For the final step, hit “Authorize” on the SalesForce Connection to authenticate using your SalesForce login details.
Once the connection has been authenticated successfully, the platform will indicate this via a green connected tick.

For more information on pushing and pulling data to/from Salesforce, the following articles might be of interest: